Hedrot is an inexpensive head rotator that you can build yourself and attach to any pair of head phones, based on a small microcontroller (a Teensy) with an attached sensor board that measures your head’s rotation, pitch, tilt, etc.
Using the Hedrot, you can monitor a binaural version of an ambisonic mix in a pair of headphones and be able to move your head around inside the sound field.
In this tutorial we will cover how to set up the Hedrot application to send it’s sensor data via OSC to Reaper to rotate our ambisonic mix with our head movements.
The goal is to setup IEM’s SceneRotator plugin at the end of our ambisonic signal just before an instance of IEM’s BinauralDecoder plugin. We will then connect the SceneRotator to our head tracker to move the ambisonic sound field, as we move our head.
PS. Like most things ambisonics, I was introduced to this trick by Bálint Laczkó.
Prerequisites
Before we begin, make sure you have the following software installed:
Unfortunately, at the moment Hedrot only works on Windows and MacOS. Albeit if you feel adventurous and want to develop a Hedrot app for Linux, the source code is available here .
You will also need a pair of studio headphones (not in-ear ones) and a built Hedrot tracker .
It is not necessary but advisable that you also read through and follow the Basic Routing tutorial.
Setting up the hedrotReceiver application

To get information from the head tracker you need to first connect it to your computer using a usb cable and then open up the hedrotReceiver application.
If it’s the first time you are using the headtracker, click on “Headtracker Settings”. In the new window, click on “reset all headtracker settings”
Then, press the “HEADTRACKER IS OFF” button to activate the head tracker. Make sure autodetect is on. You should now see the white box at the top of the app display a path to your headtracker.
Before setting anything up, you have to calibrate your head tracker. Click the “CALIBRATION” button on the main screen to enter the calibration settings.
Calibration
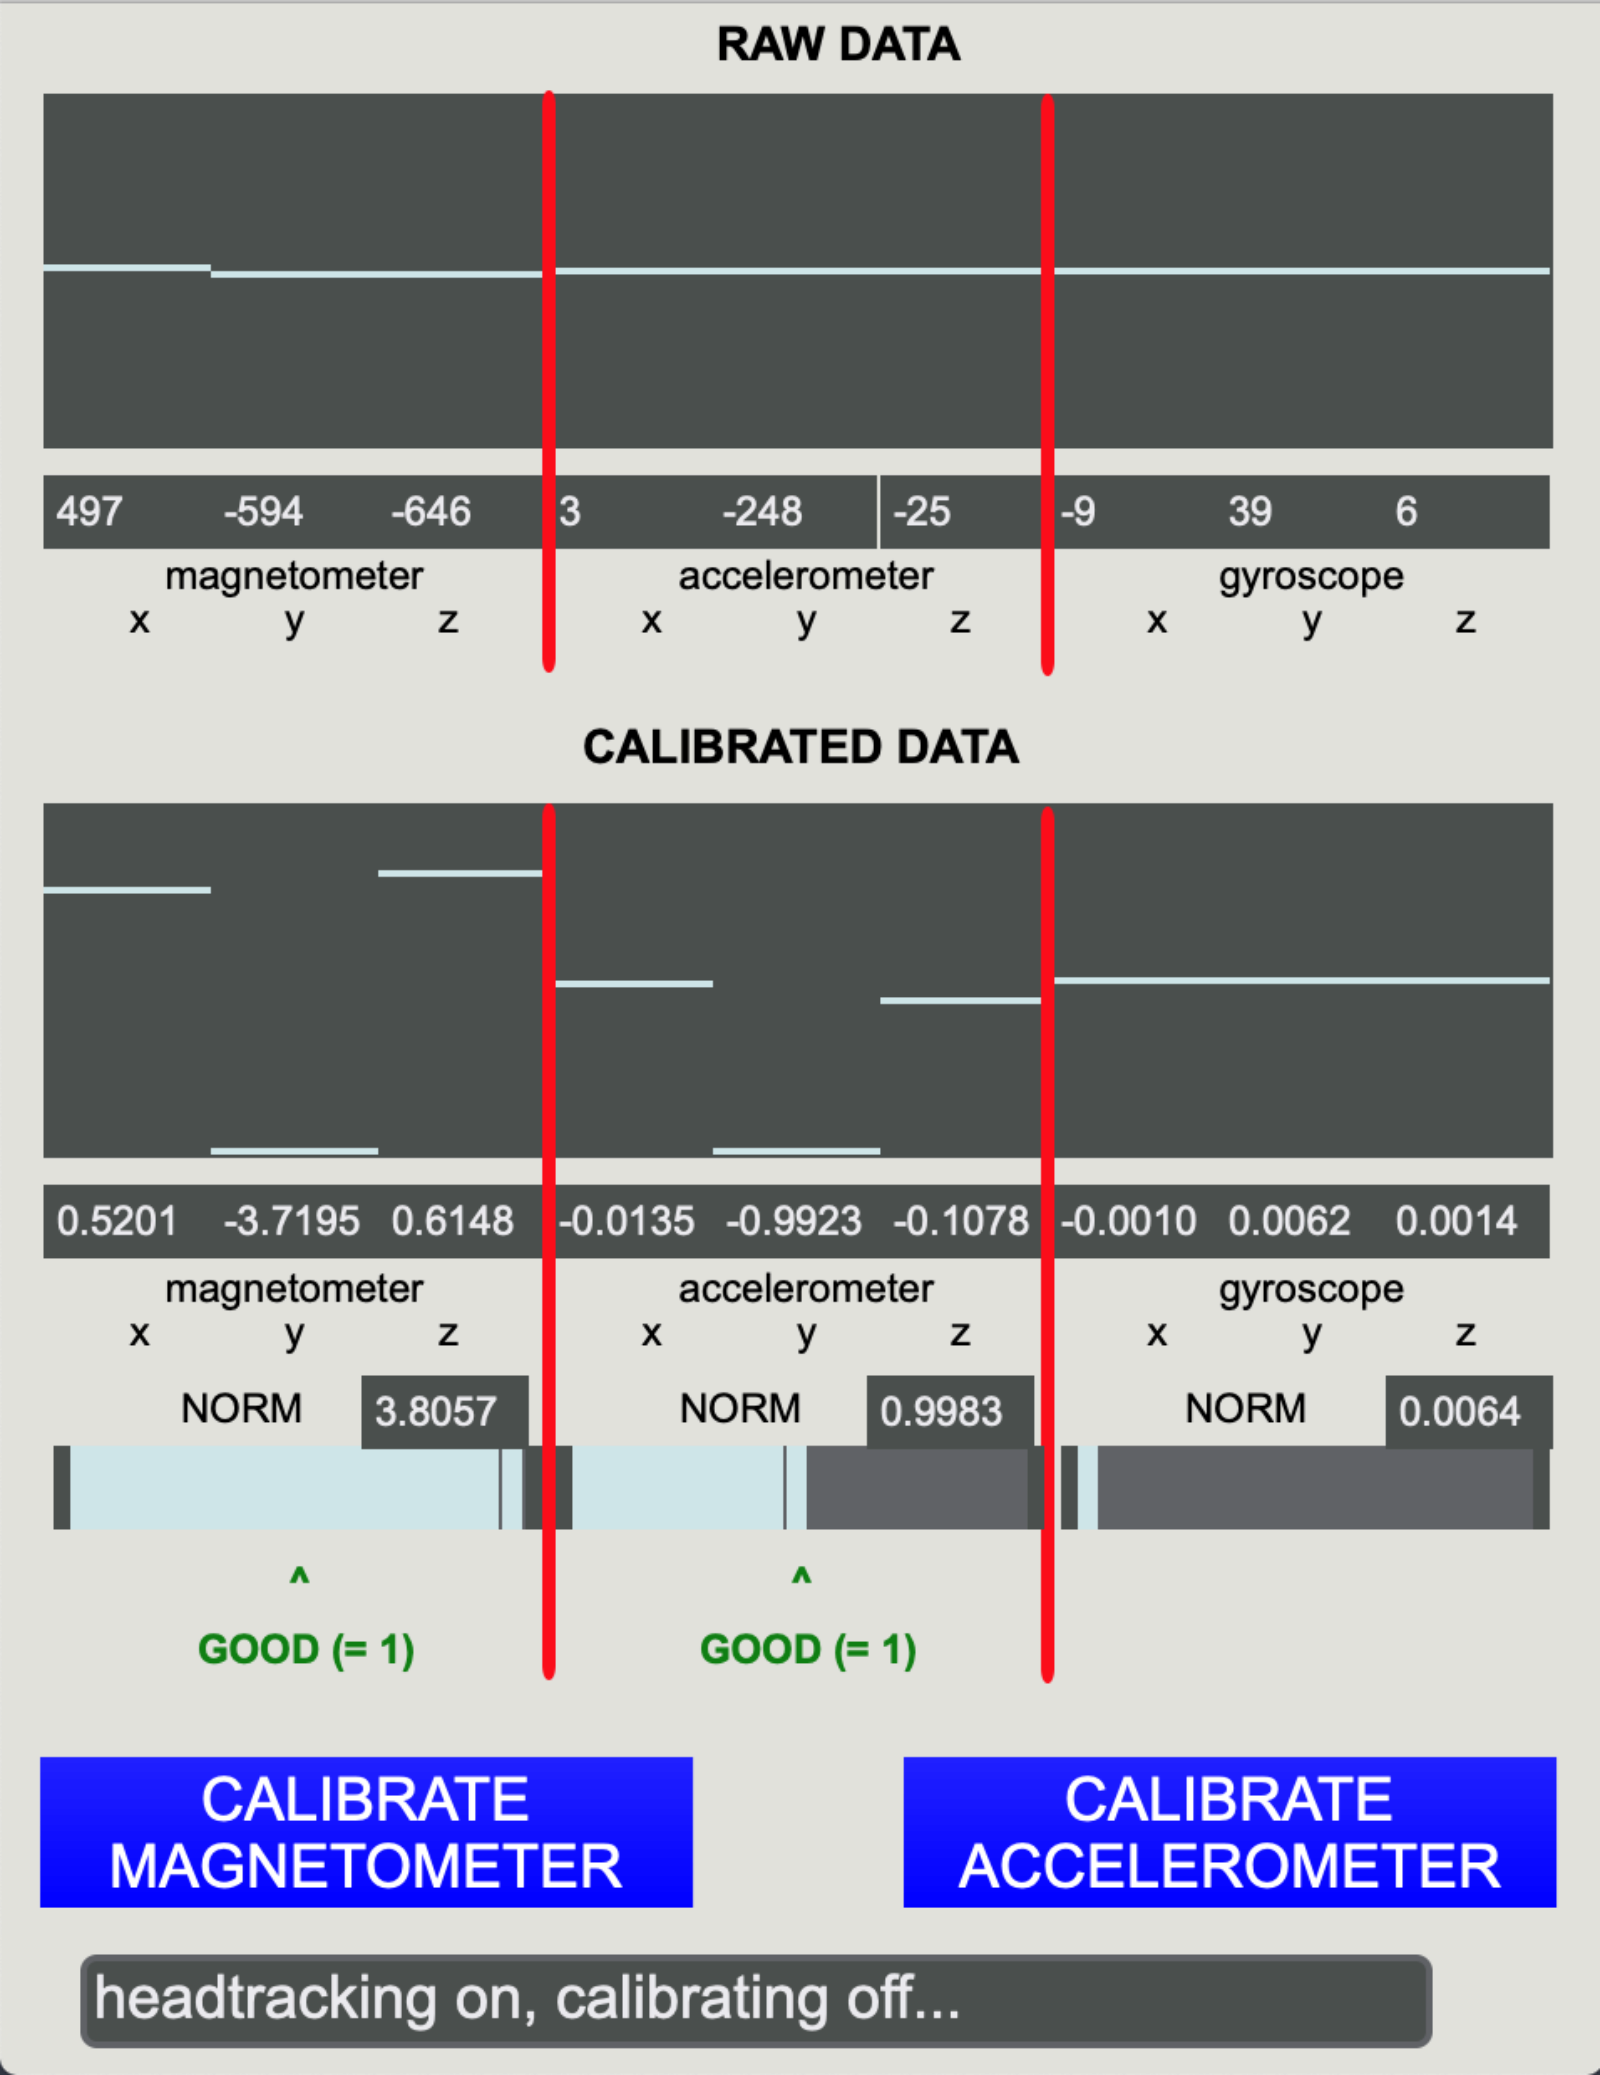
At the bottom of this screen, you can see how well your head tracker is performing. The normalized magnetometer and accelerometer readings in the bottom of the screen should ideally be somewhere around the center but they probably aren’t. If this is the first time you are using your head tracker, then you need to calibrate the accelerometer (only needed this one time) by clicking the “CALIBRATE ACCELEROMETER” button. Follow the steps written there and return to the calibration screen. Verify that the reading in the bottom middle of the screen is now somewhere around the middle.
Next, click the “CALIBRATE MAGNETOMETER” button to calibrate the magnetometer. Follow the steps in the next screen and return to the main calibration screen when you are done. Verify that the readings in the bottom left are now also around the middle, like your accelerometer.
Every time you attach your headrotator to a new pair of headphones, you need to recalibrate the magnetometer. The accelerometer only needs to be calibrated this one time (normally). That said, make it a happen to check the calibration every time you use the head tracker, often the magnetometer needs to be calibrated even though it hasn’t left the headphones.
OSC settings
Now it’s time to send the tracker’s data to Reaper. Click the “OSC settings” button on the main screen of hedrotReceiver.
The first thing we need to do, is figure where we are sending the data and modify the OSC patterns accordingly in hedrot.
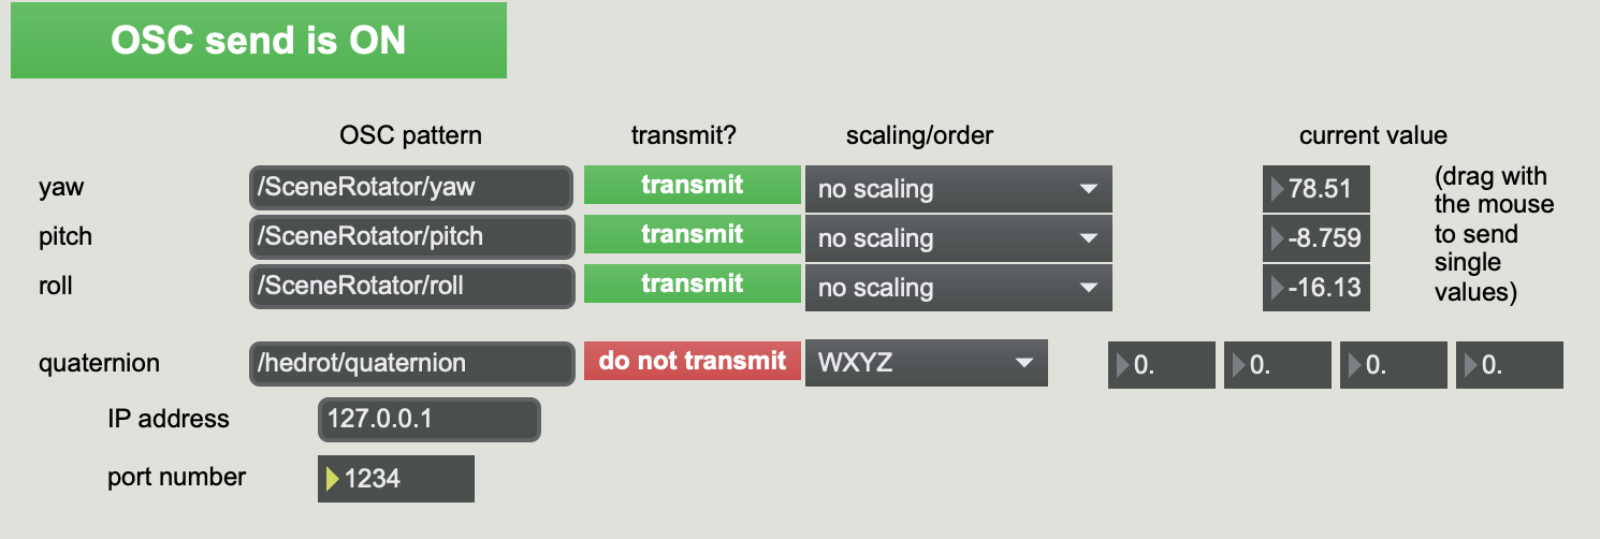
The target for this data will be an instance of IEM’s SceneRotator plugin which you can control using OSC. Change the yaw, pitch and roll OSC patterns to the following:
- yaw:
/SceneRotator/yaw - pitch:
/SceneRotator/pitch - roll:
/SceneRotator/roll
There is no need to change the scaling/order setting in hedrot, because – as we can see in the IEM documentation – SceneRotator expects values from -180 to 180 degrees, which is what hedrot puts out normally.
You can ignore the quaternion values in hedrot, as we won’t be using these.
Don’t change the port number just yet.
Setting up Reaper
As mentioned at the beginning of this tutorial, it is recommended to follow the basic routing in Reaper tutorial.
If you’re impatient though, just scroll to the bottom of that tutorial and download the Reaper templates.
Open up one of the Reaper templates ( in my case I’ve opened the third order template ). Now click the Headphones track and open it’s fx chain. Here you will find a BinauralDecoder instance. Choose headphone equalization here, if you need it.
Add an instance of SceneRotator to the Headphones just before the BinauralDecoder.
Set up SceneRotator
In your SceneRotator plugin instance, click the bottom OSC button to set up and open the network port that will receive the data from hedrotReceiver. Set it to 1234 or some other number you like. Click “open” to open this port. If you get a “Connection could not be established!” error, the port is probably used for something else. Try setting it to a different number and click open again.
Note: It is advised to always open the port in the plugin before setting it up in hedrot, as this will block the port.
Start sending OSC data from hedrot
Back to hedrot. Open the OSC settings again and set the port number to 1234 or whatever number you put in as the port in SceneRotator. Click the red “do not transmit” buttons to activate transmission. Verify that you see values changing on the right side of your OSC settings window.
Conclusion
That’s it actually. Now you can play ambisonic material on one of the tracks in the Ambisonic Bus folder track. If you don’t have any on hand, you can add the Reaper JS plugin “Pink Noise Generator” and a StereoEncoder instance to one of those tracks and play around with it’s placement.
To save yourself the pain of repeating this laborous setup process, you can save your hedrot settings as a preset file in the hedrotReceiver application. You can also save the SceneRotator’s settings to make things easier. And finally, save your Reaper Project as a new template that now includes a head rotator.